
Solar Nitty Gritty
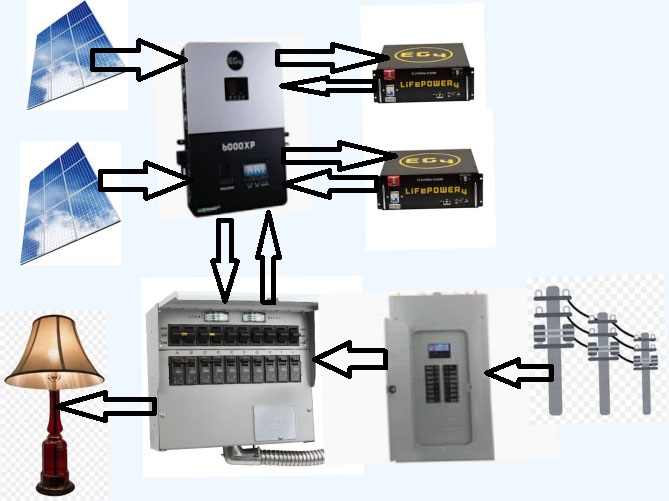
Power from the two solar strings will go into the controller which it converts from DC to AC. That power can charge the batteries and/or go to the transfer switch. That switch shown below the controller is essentially an A/B switch. It can switch the output (shown as a lamp) from either the co controller output or the regular circuit box which gets its power from the utility grid. This system does not send any power out to the grid, thus I don’t need to contact or work with the electric company for this system.
The controller will be configured to charge the batteries and supply power for my needs as long as the sun is out. If there is not enough sun or it is at night, the batteries will supply power to the converter which will create the needed electricity to carry me though the night.
I have not sized the system large enough yet, so I will still need to use some electricity from the electric company. That happens with an arrow that I do not have on the diagram which goes from the circuit breaker box up to the controller, bypassing the transfer switch. That controller has three inputs for power, the solar arrays, the batteries and a connection to a set of circuit breakers on the main power input to the house. Thus, that lamp could be powered from the main breaker box and utility OR it could be powered from the controller which may or may not have a connection to the utility. It gets a little complicated but by using the transfer switch, I can ensure certain circuits are never connected to the electric company and thus I will never pay for their electricity. Some items like the dryer and stove will draw more power than I will have available, so they will stay connected to the main circuit breaker box and always use utility grid power, at least until I get more capacity. I will run them during the daytime when the electric company rates are lowest.